
Training a text classification model with Create ML
In this post, we’ll use Create ML framework from Playgrounds to create a sentiment analysis model. Sentiment analysis is a common use of text classification to identify the sentiment of text (positive, negative, etc.).
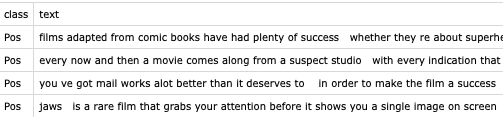
We will use the Movie Review Data, you can download the dataset from here. It’s a CSV file with two columns as shown in the image below.
Launch Xcode and create a blank macOS Playground, CreateML is not available in iOS Playgrounds. You can check the selected platform in the File Inspector.
Create a URL object of the CSV file and then pass it to the DataFrame.
import CreateML
import Foundation
import TabularData

let inputFilePath = "/Users/zion/datasets/movie-pang02.csv"
let outputModelPath = "/Users/zion/Desktop/SentimentClassifier.mlmodel"

let dataURL = URL(fileURLWithPath: inputFilePath)
let data = try DataFrame(contentsOfCSVFile: dataURL)
Split the data into train and test sets, 80% of the data is trainingData.
let (trainingData, testingData) = data.stratifiedSplit(by: 0.8, randomSeed: 7)
Use MLTextClassifier to train the model. The column names in the CSV file are “text” and “class”, so we specify them as shown in the following code. After training the classifier, we also check the training accuracy and the validation accuracy. Then evaluate the model using the test data and save the model with a .mlmodel extension so we can use it in an iOS app.
do {
    // training the classifier
    let sentimentClassifier = try MLTextClassifier(
        trainingData: trainingData,
        textColumn: "text",
        labelColumn: "class",
        parameters: MLTextClassifier.ModelParameters(validation: .split(strategy: .automatic))
    )

    // check the training accuracy and the validation accuracy
    let trainingAccuracy = round((1.0 - sentimentClassifier.trainingMetrics.classificationError) * 10000) / 100
    let validationAccuracy = round((1.0 - sentimentClassifier.validationMetrics.classificationError) * 10000) / 100
    print("Training Accuracy: \(trainingAccuracy)%\n"
          + "Validation Accuracy: \(validationAccuracy)%")

    // evaluating the model
    let evaluationMetrics = sentimentClassifier.evaluation(
        on: testingData,
        textColumn: "text",
        labelColumn: "class"
    )
    let evaluationAccuracy = round((1.0 - evaluationMetrics.classificationError) * 10000) / 100
    print("Evaluation Accuracy: \(evaluationAccuracy)%")

    // export the Core ML model
    let metadata = MLModelMetadata(
        author: "zion",
        shortDescription: "A sentiment analysis model",
        version: "1.0"
    )
    try sentimentClassifier.write(
        to: URL(fileURLWithPath: outputModelPath),
        metadata: metadata
    )
} catch {
    print("Error:", error)
}
After running the above code, you can see the following output in the console.
Tokenizing data and extracting features
20% complete
40% complete
60% complete
80% complete
100% complete
Starting MaxEnt training with 1513 samples
Iteration 1 training accuracy 0.499009
Iteration 2 training accuracy 0.940516
Iteration 3 training accuracy 0.984137
Finished MaxEnt training in 0.21 seconds
Training Accuracy: 100.0%
Validation Accuracy: 82.76%
Evaluation Accuracy: 85.25%
Trained model successfully saved at /Users/zion/Desktop/SentimentClassifier.mlmodel.
To use the Core ML model in an iOS app, drag and drop it into the project. Xcode will automatically generates a class for the model. Create an NLModel from the MLModel like below, then you can call predictedLabel(for:) to make a prediction on the input text.
private lazy var nlModel: NLModel? = {
    do {
        let mlModel = try SentimentClassifier(configuration: MLModelConfiguration()).model
        return try NLModel(mlModel: mlModel)
    } catch {
        print("Failed to create NLModel: \(error)")
        return nil
    }
}()